Monday, February 27, 2006

Hop Hop - on Momma's Quilt Like A Kangaroo!


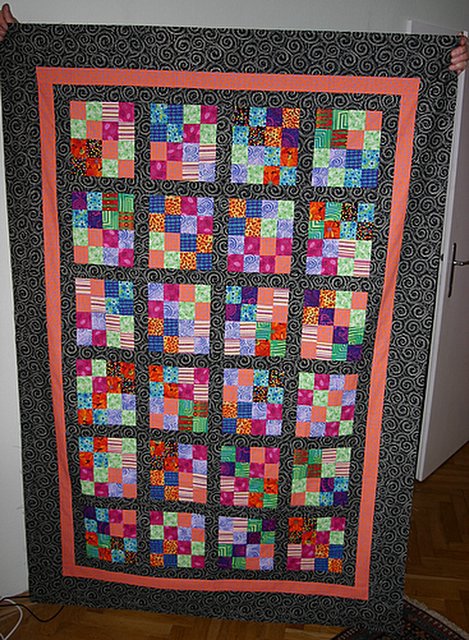
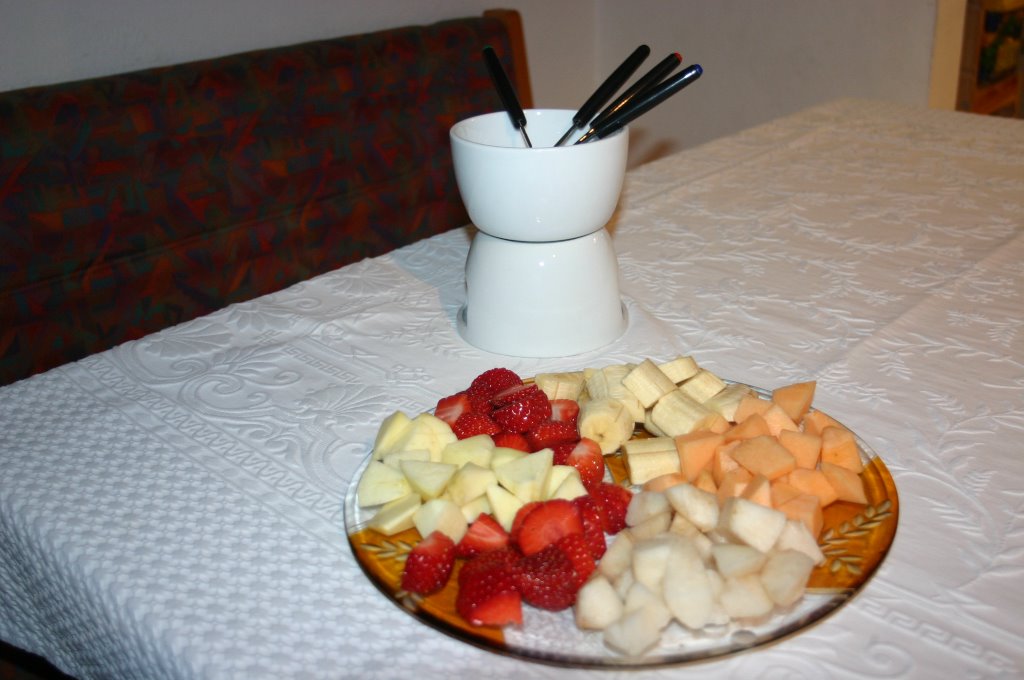
Is it any wonder that I put off putting borders on? When a quilt top is to the border stage - it is a sure sign to Little Boy that he can do a Happy Dance on the top! Just to test out any bias edges, you know? And no, there are no pins on that top, so don't worry.

As you can see - I am making progress on the Stars and Cars quilt, which I first blogged about on January 28th. Now all the blocks are sashed and since this photo was taken, 3 narrow orange borders have been added. Next up, the wider green borders (which is the background color). And then... well, I don't have any more fabric suitable for the final border so guess I will have to hit some quilt shops when I get back to the US.

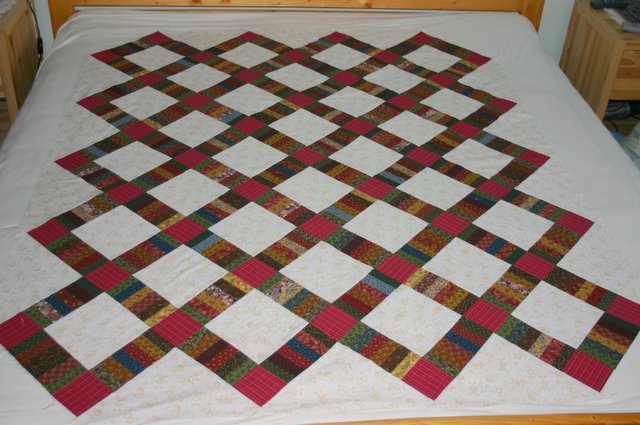
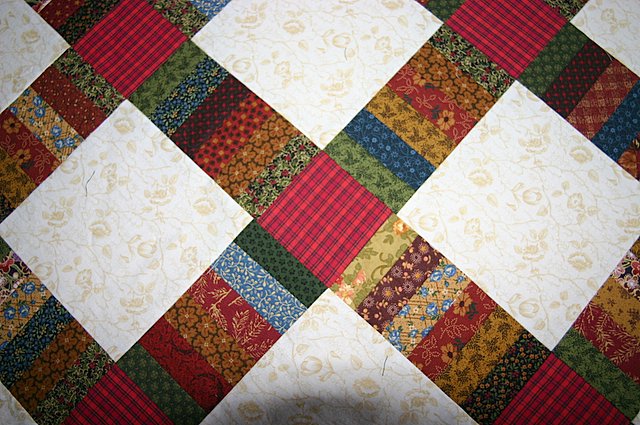
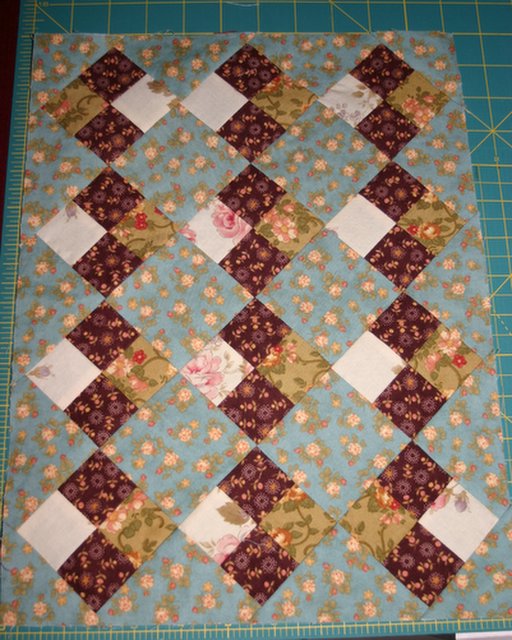
I had a bit of a quandry with this top - the red sashing fabric and star points is this super fab Moda with stars. I just love it! I had just a TINY bit too little fabric for the sashing. TINY. The trouble was - the fabric is 44" wide with a large white selvage so you can read all the design information in large print (whatever happened to the small print?). I needed to cut the sashings 11" and according to the directions and hence the yardage requirements, I should have been able to get 4 sashing pieces, all 11" in length from a strip. Humm. With a little thinking, I figured on using 1/4" of the selvage (I never use a selvage, but really wanted to use this fabric! I can hide the 1/4" of white in a seam) and cut each piece a BIT shorter than the 11". So, the posts don't line up exactly - they are each off by about 1/8", but guess what? I don't think anyone will really notice and it was a small price to pay in order to use the fabric that I really wanted to use! My point? Fabric widths vary! Always buy more fabric than what the pattern calls for. You can always use the extra in your next scrap quilt, but I would rather have a bit too much than a bit too little.

And, just so you know - as I blogged about originally, Little Boy still doesn't want this quilt. He wants me to give it to one of his cousins, who just happens to love to play with him and shares all his favorite cars and trucks when we visit. Now, you might think that this is a perfect solution, and it is... except - that once I give a quilt to one of my nephews, that leaves my other TWENTY nieces, nephews, grand nieces and nephews out in the cold! And that count doesn't include DH's side of the family. Did I ever mention that I am from a BIG family??? Grin!
Posted by Picasa

Saturday, February 25, 2006

Cot Quilt - with borders!


Ta - Da! My "3-Times A Charm" Cot Quilt - with borders and all ready to go to my longarm quilter for her finishing magic! I first blogged about this quilt on Jan. 23rd and you can find the story behind the name, pattern and fabrics on that post.

This little quilt finishes up at 46" X 68" - I think a perfect size for a growing toddler. Bye the way, Little Boy really likes this one and was doing a happy dance all over it this morning - of course - while I had it spread on the floor and was pinning the final borders on. It truly is amazing that this top appears to be perfectly squared - I had a tiny bit of easing to do on 2 of the orange borders and about 1/4" of easing to do on one final black border and that is it!!!!

I use Bonnie's method of putting a border on (www.quiltville.com). I think her directions are clearer than mine, but in a nutshell... 1. Smooth the quilt out on the floor. 2. Roll your border out onto the middle of the quilt. 3. Put pins at the top and bottom - this is your center measurement guide. 4. Now, bring the border over to the side and pin to the quilt sides - using the top and bottom pins as your guides. It should line up perfectly or else you need to do a bit of easing in between those pins. This saves you all the hassel of taking 3 measurements of the top, averaging them, measuring the border, etc. etc. Yuck. I don't like to measure - so this method works perfectly for me! Basically, the idea is to get the outside edges of the quilt the exact same measurement as the middle of the quilt - this is so your quilt will quilt out flat. Believe me - your long arm quilter will thank you for square quilts!

Anyway, my very least favorite part of making a top has got to be the borders (not because they are hard, but because I find them a bit boring, I mean afterall - that is sewing time I could spend starting a new, exciting top right?), so I am very pleased to have my part finished!
 Posted by Picasa

Friday, February 24, 2006

The lime green scarf


Here is a photo of the lime green scarf I made for one of my sisters - plus some fun accessories! I couldn't post a photo of it until she got the package - didn't want to ruin her surprise!
 Posted by Picasa

Thursday, February 23, 2006

Time to rip...


I know, I know - I just said on my last post that I double check everything - and I do! I did make a test segment for this border. My piece looked just like the illustration in the directions - so I thought it was right and off I went - sewing. But, something in the back of my head was bugging me. Just to double check, I took a few of the finished segments and sewed those together. Looks ok, right? I thought so too until I realized that the side seam allowances would have to be 1/8" in order not to chop off the points.

OK, you should know by now - I hardly ever use my seam ripper. If I sew a block wrong - I leave it. BUT, I don't like to chop my points off and I don't like to use such a skimpy seam allowance that you just know the seam is going to pop the first time someone sits on your quilt. So, what am I to do? Usually, I would recut new fabric to avoid ripping. But, I don't have enough colored fabric to recut. So, I have to rip to selvage the fabrics. Fortunately, I do have more of the cream background - phew! Tomorrow I will try to cut a few different sizes and see what works best to give me a side seam allowance of 1/4". I am thinking another 1/8" should do it.

Right now from the point of the square to the edge it is a very scant 1/4". You iron the cream toward the colored squares so the point has a slight bump due to all the layers of fabric behind there. So, when sewing - your needle will go a tiny bit off to the side due to the bulk which is going to give you a finished seam of 1/8". Or you can sew through the hump and cut off the point. Sigh.

I wish I had figured this out before I sewed a triangle to 66 squares, pressed and then started to sew triangles to the other side of the squares. Anyway, that was my sewing time tonight after Little Boy went to bed. Rats!
Posted by Picasa

Bars Quilt - in progress


I cut this quilt out on Friday night. And, no - I haven't spent all week chained to my sewing machine. Actually, some days I didn't anything except pin or iron. Anyway, this is as far as I've gotten with it - still have to add borders (one of them being pieced). I really want to finish this top within a week.

Sometimes people ask me how I get so much sewing done. I sew in segments. First, I cut everything out. Next, I make 1 block or piece the segments together and measure everything to make sure I don't have to adjust my seam allowance (I almost always have to adjust something - somewhere - so this step is worth the extra effort). Once I am sure it all fits together nicely, I pin all the pieces together. I pin. I know lots and lots of people don't pin, but I do. I can easily pin while waiting for dinner to be done, while sitting at the table while Little Boy colors or plays with playdough - whatever. Then, when I finally get around to putting the sewing machine on the dining room table to really sew - everything is all prepared. Then I put the sewing machine away - because chances are that we will need the table before I get to sewing again! Next - I will iron all those segments - again in a grabbed 10 minutes here or there and then it is back to the pinning routine. Depending on the quilt pattern - at some point in time everything needs to be measured again to make sure the next set of pieces are going to fit. All these little 10-15 minute segments add up. This quilt is taking a bit of extra time so I have been sewing a bit more at night after Little Boy is in bed than I usually do, but I try to get everything prepared for the sewing part at odd times during the day.

The pattern is Crossed Tracks from the book Save the Scraps by Gayle Bong. After I get the borders on I will write about what I think about the pattern - directions, techniques, etc. all that good stuff. So far, this is my husband's favorite quilt of the winter - I am liking it too. And just when I was celebrating using up the last of those dark Thimbleberries!!!
 Posted by Picasa

Bars Quilt - close up of fabrics


I left my camera lens for close up details in Canada, but this shot should give you a good idea of the fabrics I used - mostly Thimbleberries, but also few others (you might see - I am still using the fabrics from my Broken Dishes quilt!). I bought 4 yards of that red/orange plaid and was wondering if I would ever find a use for it! I think it is perfect for this quilt! Posted by Picasa

Tuesday, February 21, 2006

Doll Quilt in Progress


I made this little top 2 weeks ago. It measures 11.5" X 15" and the finished size of the 4 patches is 2.5". I had some left over strips from my Broken Dishes top (photo in my December archives) so zipped the 4 patches together (so you might recognize the fabrics!). I got the math formula for cutting the setting triangles from Bonnie's site over at www.quiltville.com - she has the math all figured out for you if you are using a bigger squares, but I had to get the calculator out for these little guys! Her formula worked out perfectly - and believe me, I am no expert at math so it was nice to have easy access to the formula and have all my pieces fit together!

My plan is to put a skinny white "border" with cording in it - attached to a wider brown border. I don't have the cording so the top is on hold for now. My sewing machine at home even has a cording foot - so might as well put it to good use.

It will probably be sometime in April before you see a photo of the finished project and I will let you know then how the cording thing worked out! In anycase - it is a good sized project for an experiment!
Posted by Picasa

Thursday, February 16, 2006

Desperado Blocks


Ta-Da! Desperado blocks. The fabrics are hard to get a detailed photo of, but this will give you an idea.

Do you ever start a quilt pattern, and even though it is fairly simple, just struggle through the entire thing? Well, that was this pattern for me. I don't know why - maybe it was the mono-chromatic color scheme, the fact that I had to refer to the directions for every cut, I had to keep a sample block (in 4 segments) on the ironing board to refer to when pressing to get the seams to butt against each other, or maybe - it is just that Spring is around the corner and I want to wrap up my winter quilting projects. Whatever the case, my mind definately wasn't "into" this quilt. Yes, I made a block with a mistake - it is on the bottom right - 2nd block up from the bottom. DH asked if I was going to rip it apart and I said "No, it is a reminder to me that I am quilting with a 2.5 year old underfoot!".

All that being said - I am still pleased with the top so far. It looks about what I envisioned when I started - it just needs a skinny inner border and then a wider outer border (the outer border will be more of the dark green). Each block measures 9X11. The finished quilt is supposed to be 56 1/2" X 66 1/2", but I made an extra row, so add another 9" to the finished length. Despite my mind block, it did take only 2 weeks to piece up to this point, so that isn't too bad. And some day, I might even try this pattern again - I think it would look stunning with a bunch of bright hand-dyed fabrics.

The next 2 photos - a close up of one of the blocks - and the magazine cover where I got the pattern from (McCall's Quick Quilts - May 2005).


Wednesday, February 15, 2006

Chocolate Fondu for Valentine's Day


A new family tradition is born... chocolate fondu for Valentine's Day!

I bought this cute little chocolate fondu pot last week in anticipation of the holiday. Not that DH and I have ever ever done anything special for Valentine's Day, but we now have a Little Boy who just delights in every holiday, so what is a Momma to do? And, I want holidays to be centered around special foods and traditions and spending special time with loved ones - not ALL about gifts - so I thought the chocolate fondu pot fit the bill to a T!

This, being our first forray into the world of chocolate fondu - we tried a variety of fruits. No surprise - the strawberries were hands down the favorite, closely followed by the bananas. However, the apples, melon and pears also disappeared - actually - we had 2 fruit plates (with lots more strawberries and bananas) for 6 adults (2 of whom only nibbled) and 1 toddler and there wasn't a single piece left. And this was after we had all stuffed ourselves on a wonderful dinner - meat fondu with a variety of salads and breads (well, we are in Austria - no way to get around having at least 3 different kinds of breads with every meal!). So, all in all, the chocolate fondu was a huge success and definately something we will be doing again.

The recipe:

200 ml whipped cream
100 grams sweet milk or cooking chocolate (from the baking aisle)
100 grams semi-sweet chocolate

Heat whipped cream in pan on stove until hot, but not boiling. Add broken up chocolate and let melt - stirring occassionally - on very low heat. When it is all melted and nice and warm - put it all into the fondu pot with a little candle underneath.

Makes enough chocolate for 4 people - 2 fruit plates are better than 1! And that would be 4 people after a meal - so if you just want to have a chocolate fondu party, you would probably want more, which means you would need 2 fondu pots.

OK, Momma confesses - presents are nice too! We did get Little Boy a small teddy bear holding a heart and Tante (auntie) brought him a small bear and his cousin brought him a little wind-up snowman which he has latched onto in a big way. They also brought me some Valentine's themed napkins and a little candle. And, Little Boy had his own presents to give - we had a few photos printed at the camera shop and I put them in frames. Nothing elaborate, but a nice thought and Little Boy had fun helping to wrap them up and was very excited to give them.

Really, we all had a fun time! Believe me - much easier than trying to plan some romantic dinner at a restaurant with a toddler - is there such a thing?

And, an added bonus for inviting some family over to help us celebrate... a beautiful bunch of roses - a real surprise and aren't they lovely!


Monday, February 13, 2006

Eggenberg Castle


The next 2 photos are from inside the inner courtyard


The Austrian country side is dotted with many castles. This is Eggenberg Castle, which is in Graz and is the largest castle in the region of Styria. It was built in 1625 and has 365 windows. It is famous for its baroque architecture. I have only been here during the winter so have never been INSIDE the castle, although from looking at postcards - it does look beautiful! And, I am sure the grounds are absolutely lovely, but right now they are covered in snow. Oh well!
Anyway, Eggenberg Castle was our little outting on Sunday. It was fairly cold, but a walk was in order and I thought the castle would be a nice change of pace. It is just $1 per adult to walk the grounds... and what else can you do for $2? There are many peacocks on the castle grounds and Little Boy was thrilled with this peacock's display of feathers (see the moat behind the peacock - it goes all around the castle!).


On our way out, I snapped the photo below of the trees. DH asked what I was taking a photo of - there isn't much to see, but I thought it was nice - in a winter sort of way. It took us 45 minutes to get ready to go and we stayed for 45 minutes - all in all - a pretty good outing with a toddler! I hope you enjoyed my photo show.

Sunday, February 12, 2006

Griessnockerl Suppe


This is Omi's recipe - authentic Austrian.  My husband translated it for me to share.  Mmmm... a steaming hot bowl of griessnockerl suppe. This is one of my very favorite Austrian soups. We eat our big meal of the day at noon and in the winter we always have soup as a first course.

Griessnockerl Suppe

50 grams butter
1 large egg
100 grams cream of wheat (USA) or Grieß in Austria, or Farina...depends where you live!
pinch of salt
a sprinkle of chopped parsley
1 liter of salt water
1 liter of stock (chicken, beef, vegetable...)
garnish of chopped chives

Whip butter. Add eggs, cornmeal, parsley, salt - mix altogether. Let stand about 15 minutes. Use 2 soup spoons to form nockerls and put into boiling salt water. Cook on low rolling boil about 10 minutes. Take off heat and let stand in water for another 10 minutes (basically, you want the nockerl to be cooked through - it will be a nice off-white color in the middle when done - if it is a bit hard and yellow it isn't done yet). Take the nockerls out of this salt water and serve in the hot broth. Garnish with a sprinkle of chives. You can also freeze the nockerls for later use. Enjoy!
 Posted by Picasa

Thank you to my reader Silvie for telling me that the ingredient is cream of wheat, or Grieß!  My husband translated it incorrectly for me and although I know the bag says Grieß, I did not realise his translation was wrong!

If you buy anything from Amazon, I would appreciate it if you would use my links. Thank you!


Saturday, February 11, 2006

The orange scarf


OK, a photo of the orange scarf I referred to in my previous post about the blue Shitzu scarf. Looking at the photo, it is obvious that I made it skinner (not wider) than the blue one, so just ignore that little bit of mis-information - in other words, I have no idea how many stitches I cast on to make this one. I do think that the orange one folds over itself a bit, but it is still a great scarf! And no, Silly, I do not wear my scarfs like this - I am just trying to show the length (2 balls of yarn). I like the blue one better though. Anyway, it is all wrapped up and destined to its new owner today before it gets to warm to enjoy this year. And, I am busily knitting away on a lime green SPRING scarf in very light weight yarns for yet another sister. I am tired of the winter yarns and this new yarn is fun to work with. It is YUMMY, so stay tuned!
 Posted by Picasa

Wednesday, February 08, 2006

Laundry Day


This photo was taken last month, but to give you all an idea... it is always a rough day around here when the FAVORITE blanket gets washed. I use the fastest cycle (30 minutes) and maybe you can see on the machine - it has 12 more minutes to go. Fortunately, this blanket drys super fast, phew! So sorry Little Boy, I put it off as long as possible but it has to be done once a month - you know - when it starts to get... crunchy! Posted by Picasa

Monday, February 06, 2006

The Shitzu Scarf - photo

Not sure what happened to this photo with my last post, so here it is again. Posted by Picasa

The Shitzu Scarf

In December I knit a super soft scarf using a varigated orange/brown yarn. I will have to see about taking a photo of that scarf to share. Anyway, so soft was this scarf that Little Boy declared it was as soft as Yoko and Auntie would like that scarf - because Yoko is soft. Simple 2.5 year old logic. You see, Yoko is my sister's Shitzu, and she really is a very soft dog! Well, I didn't think orange and brown was necessarily my sister's color, so I decided to knit another scarf using a gorgeous blue variagated color, but with the same soft yarn. Little Boy was really loving the "Yoko" scarf - so much so that he somehow managed to get the stitches off the needle - when I was almost finished. Yikes! I tried to fix it, but to no avail - the yarn is furry and hard to see and I just kept loosing those stitches. I would think it was fixed, knit a few rows and then find a big hole! So, I pulled the entire thing apart and set it aside for a bit.

The yarn and knitting needles was the 1 project I packed for our 4 day mountain get-away. One thing I like about knitting - it is so portable. And - ta-dah! I reknit the whole thing. It is off in the mail tomorrow for Auntie! The Shitzu Scarf, of course!

Details - for those knitters who want to know are below - please excuse my pattern writting abilities! With all the yarn overs, the pattern will make a nice "hole-y" type scarf, but not too hole-y, if you know what I mean. A little bit of a lacey effect.

Knitting needle size: I used 8 mm European size - simply because that is the only pair of needles I have right now. So, anything around that size. I tend to knit a bit loosely.

Yarn: Teddy by 4 Seasons. 50 g, 65 meters (71 yards) per ball and I used 2 balls. This yarn is soooo soft! 100% polyester micro. Made for Grundl, Germany. I used colors 620 and 625, but have no idea which was the blue or orange now. No, I won't tell you how dirt cheap the yarn was - we pay a fortune over here for quilting fabric, but yarn is a bargain! Too bad I don't knit more.

Pattern: Cast on 17 stitches. Row 1: Knit 1, Yarn Over, Knit 1 to end. Row 2: Knit 1 (this is the odd stitch on the end) then Knit 2 together to the end (you are knitting 1 stitch and 1 yarn over together - these stitches are very close to each other on your needle so this is easy to do. When you are done with this row you will have 17 stitches on your needle again). Row 3: Knit 1, Yarn Over, Knit 1 to end again (Row 1). Just keep repeating these rows over and over until you want to cast off (I always wait until the last little bit of yarn).

I made the scarf wide, but you could make it narrower just as long as you cast on an odd number of stitches. My first orange/brown scarf was wider (I cast on 21 stitches), but I felt it folded over a bit, so made the blue one narrower. I am fairly sure that if you knit it at about 13 stitches with the next size needle up - you could get a decent scarf with just 1 ball of yarn instead of 2 - if that is what you had on hand, but personally, I like a wider/longer 2 ball scarf. Just make it to your own peference! Enjoy.


Sunday, February 05, 2006

Blue Sky!


Sometimes a girl just has to have - some blue sky! Winter tends to be gray, gray, and more gray, so it is nice to go up to the mountains and have some blue sky and sun! This is not always the case - sometimes we get snow and more snow up there, or bitter cold - either way you are housebound - but this trip we really had perfect weather (ok, I admit - no palm trees in sight, but as perfect weather as you are going to get up in the mountains in the winter!)

We went up for 4 nights and had a wonderful time! The 1st day was just beautiful; the temperature was up to 4 C so we took Little Boy out sledding. We found a nice, gentle sloping hill; positioned DH at the bottom and Momma at the top. One little push and - Oh, absolute GLEE! He laughed and cackled down the hill and begged - "again, again, again!" It was so much fun - and I think we actually stayed out longer than what it took to get him dressed (a joke, but any Mom of a toddler will understand!). Later we went for a walk, and although not "long" we went at a snail's pace so Little Boy could carefully knock all the little ice-cycles off the edges of the snowbanks.

Day 2 - Momma got to ski - the weather was perfect at about 0 C. I had lunch outside in the sun and scored a sun chair for a little rest. The only thing about eating outside - you have to eat faster than your food cools off or you have a cold plate. I came home early enough to bring Little Boy out sledding again. This time around he was more interested in pushing the empty sled down the hill and then giving a big chase. We were out so long that DH actually came to get us in the car, which was nice as Little Boy was so tuckered out I would have probably had to carry him back home (up hill!).

Day 3 - we all took the chair lift up to a restaurant for lunch - Little Boy's first time on a chair lift and he really liked it! After lunch Momma went skiing with a friend and DH and Little Boy took the chair lift back down. Again, it was a beautiful day (-2 and no, we didn't eat outside with the baby). That night we took a little "Night Hike" and toward the end of our walk it had started to snow a little bit and the snow was all glitterly. It was cold so the snow was very crunchy underfoot, which fascinated Little Boy with each step. With all the fresh air and exercise (and high altitude), he was out like a light as soon as I got him tucked in for the night.

Today the view outside the window still looked wonderful, but the temperature had dropped down to -12 C. We spent the morning playing inside with trucks and coloring books (and packing up) and then Little Boy and I ventured out for a walk for - of all things - icecream! We had started to walk back, but the wind was biting, so we popped into the tourist office and called DH to come get us with the car. It must have been just the right combination of exercise and fresh (or should I say cold) air though because Little Boy did sleep most of the way home in the car, one happy little camper.


 Posted by Picasa