Wednesday, May 31, 2006

The Merry Month of May - in review


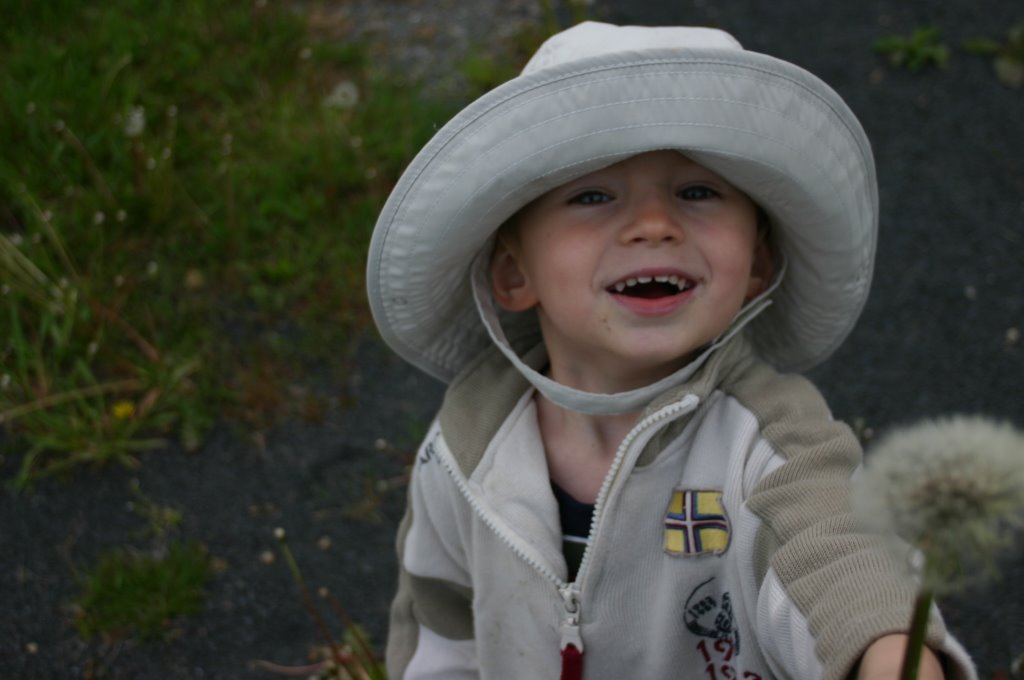
My favorite photo for the month of May: "Dandelion for YOU, Momma!"

Little Boy absolutely DELIGHTS in picking flowers for me - each one a treasure - and I have a little bud vase on the counter full of his offerings. When they die, I have to be very careful to dispose of them when he isn't looking or his feelings are deeply hurt. Even the stems and dead buds are precious in his opinion!


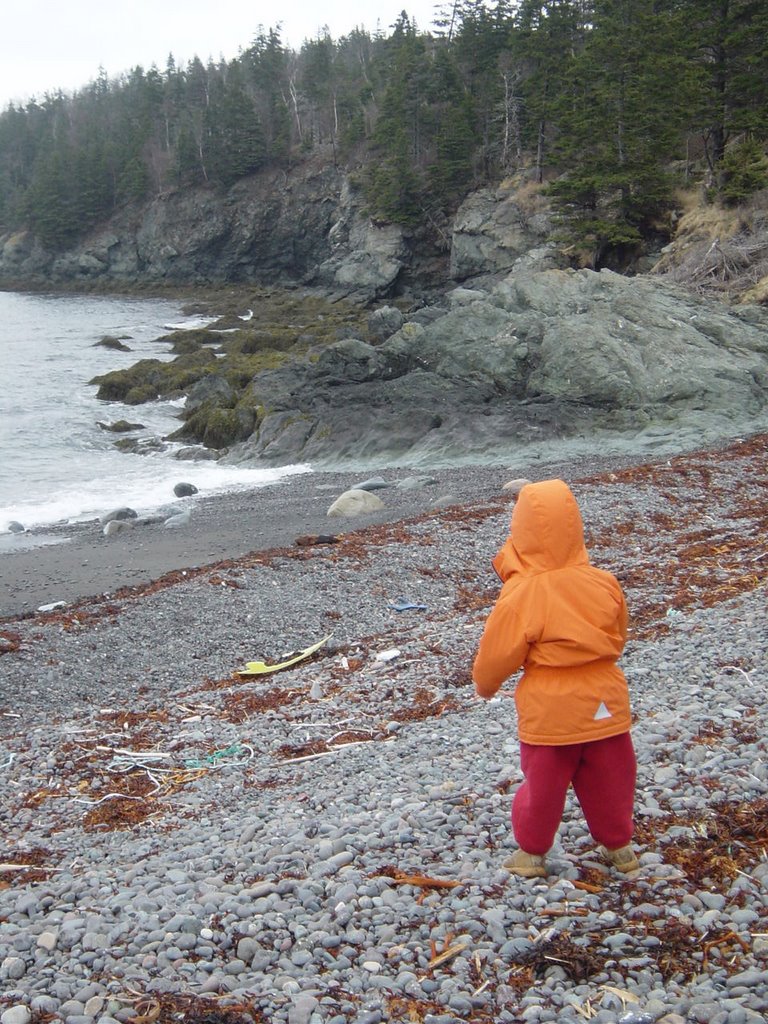
This photo is from a walk to a rocky cove to throw stones on a gray, stormy day. It was a fairly cold and rainy month mixed in with some sunny days too. I don't have any puddle stomping photos because the camera battery was dead and it took me a few days to find the charger! Our big play purchase for May was a pair of rubber boots for Little Boy which he immediately tested out by SITTING in a huge, muddy puddle. "Nope, they don't work, Momma!" he gleefully shouted. Gee, really?! I wonder why??? So, our first day out with the boots didn't go exactly as planned, but once we got over the sitting in puddles bit, the boots actually do work just fine and have seen some good use this month.


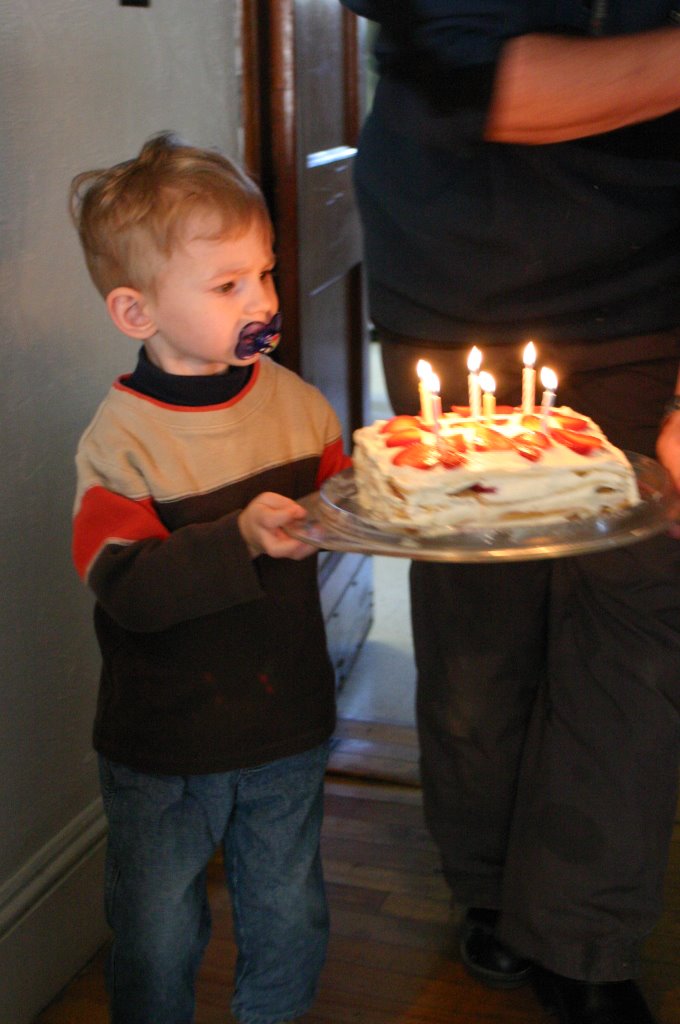
And, here he is oh so carefully doing the honors (with a little help) with my birthday cake! This is a Swedish strawberry layer cake with berries and home-made vanilla sauce in between the layers and a cream cheese frosting - I hardly ever make it because it is time consuming, but oh so yummy!!


And here he is having a fun time on the slide at a playground we like to go to. Are we the only 2 people left wearing a hat and mittens in May? The good news is that last week the weather finally started to warm up a bit and we switched over to sun hats. To give you an idea - just this week the lilacs started to bloom! A cold spring.


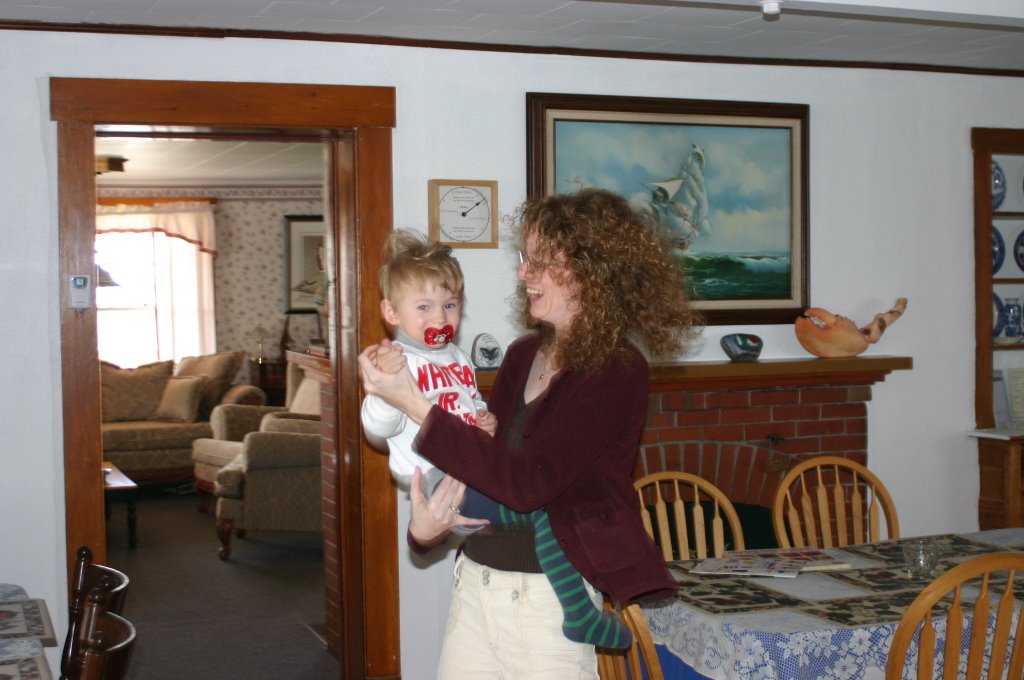
All in all, we have had a really good month. Oh sure, we have had our share of daily grind - Toddler temper tantrums (after all, it is so frusting being a Little Guy sometimes), some major diet changes, the fact that showers are something like a distant memory these days and my sheer exhaustion by 8:30 pm, just to name a few... but there are many, many delightful little moments in our days too. This is such a fun time - you can almost see the little gears whirling away in Little Boy's head as he learns about and discovers his world. I can honestly say that I am very happy and I think that happiness is reflected in my darling Little Boy's face!

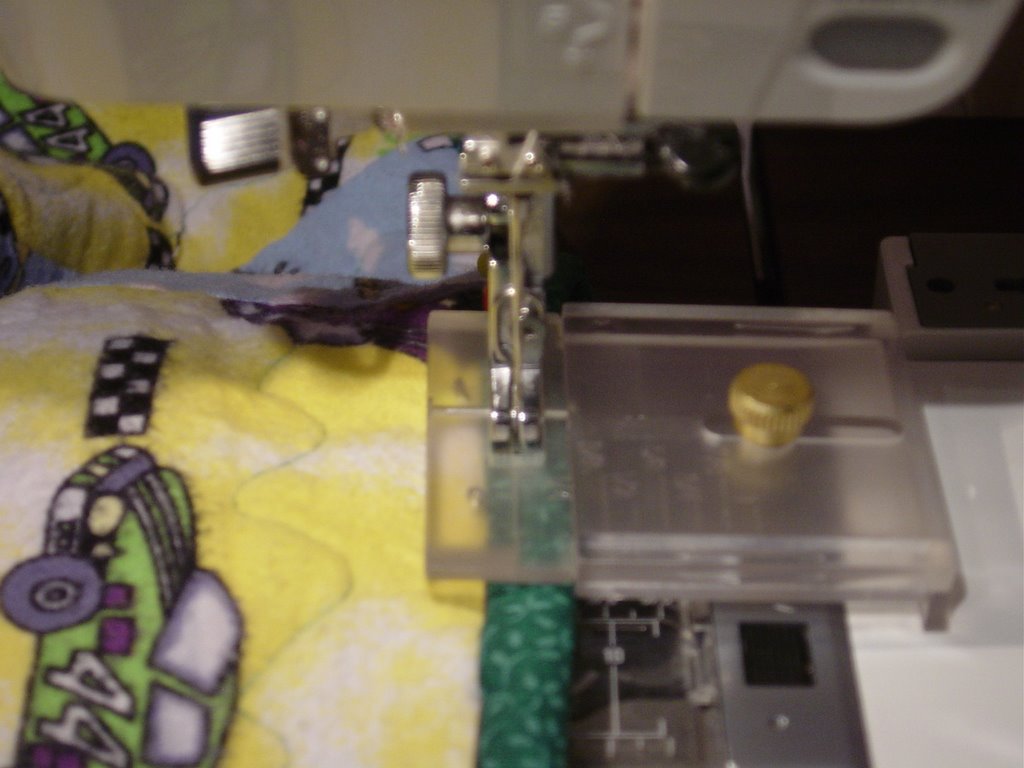
And - on the sewing front... as predicted, not too much sewing going on, but I did get some things done. Getting anything done sewing wise these days is difficult (goes with that 8:30 exhaustion bit), so I am fairly pleased with my following list:

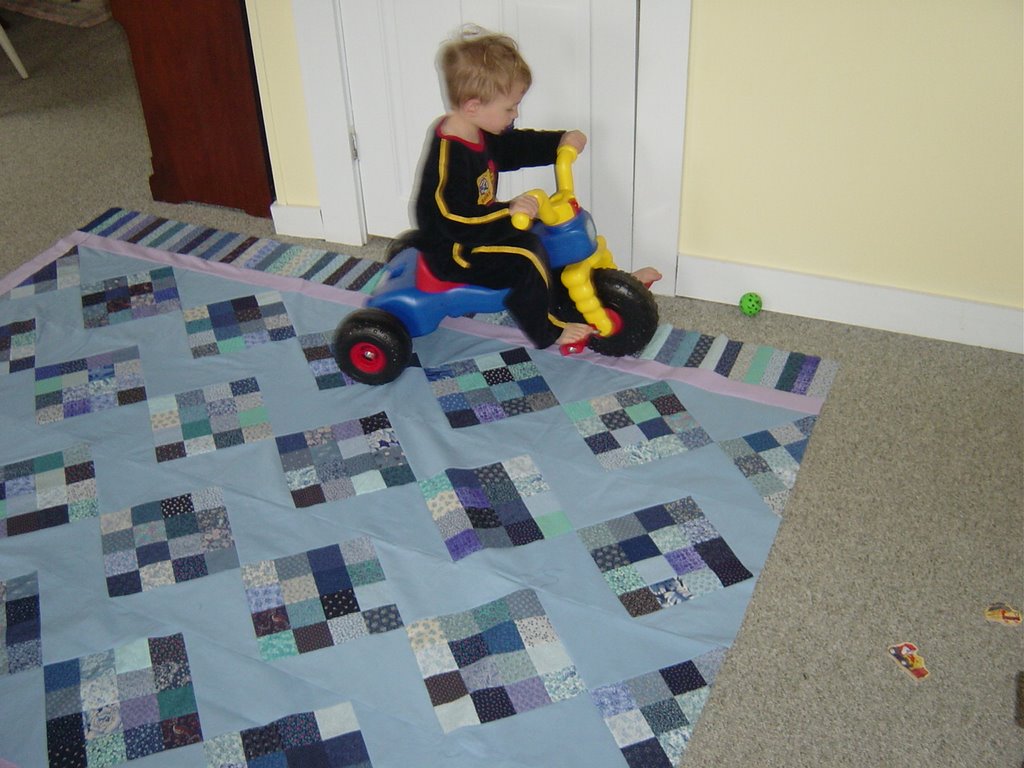
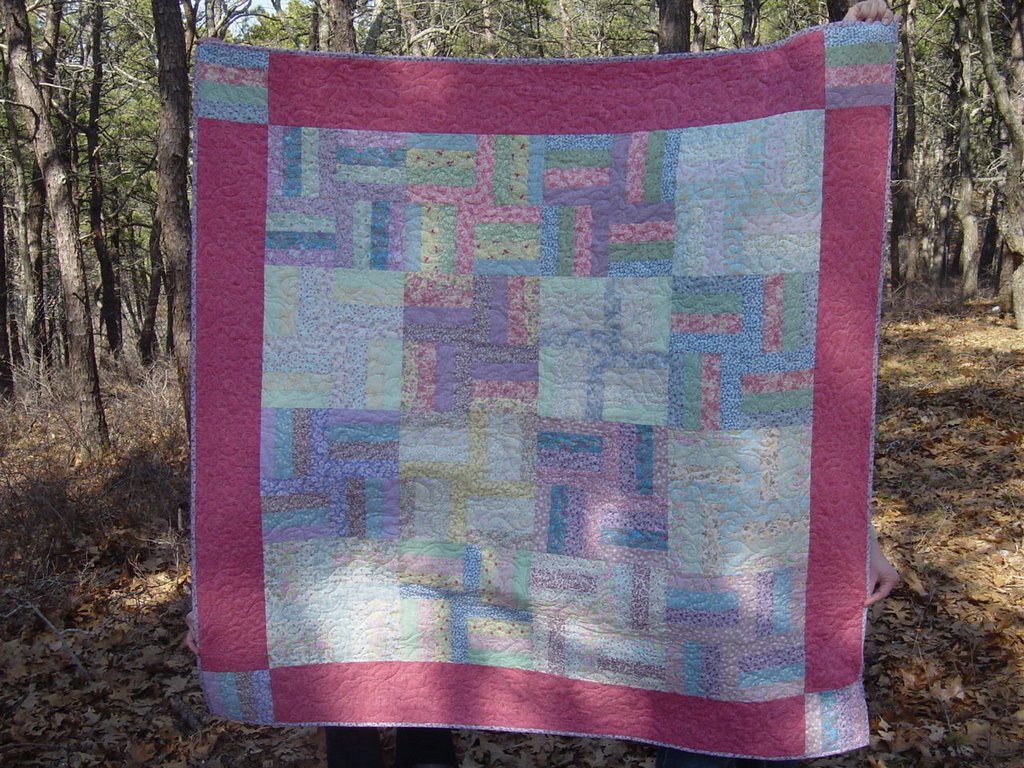
1. Finished my Blue Scrappy Quilt! Ready for long-arm quilter!
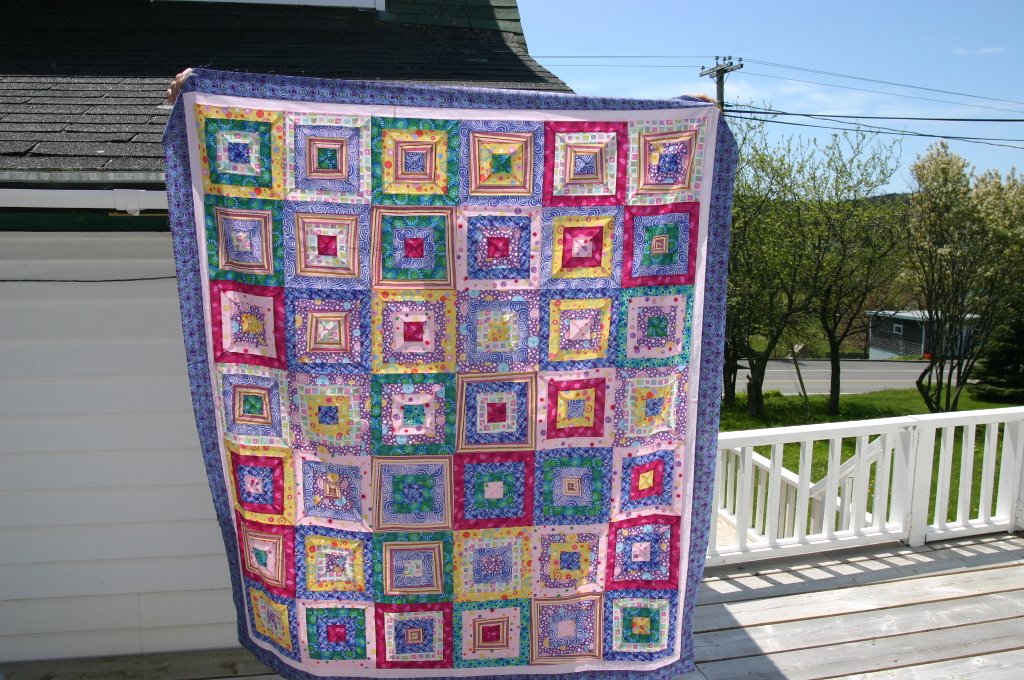
2. Put final borders on Mitre Boxes! Ready for long-arm quilter!
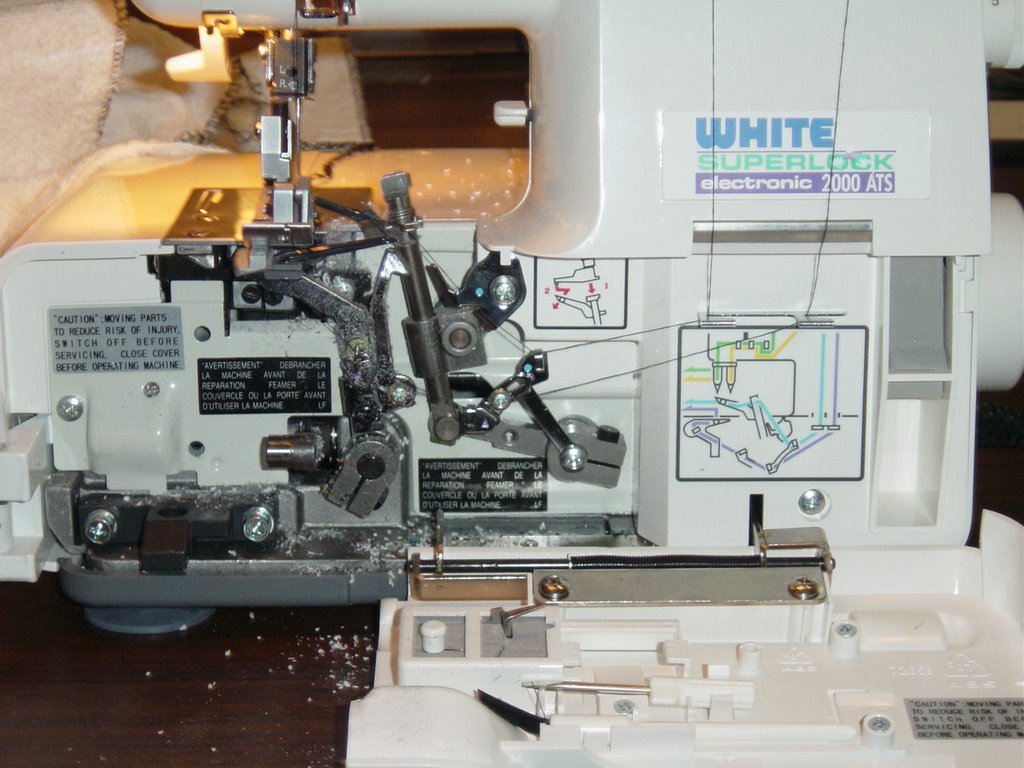
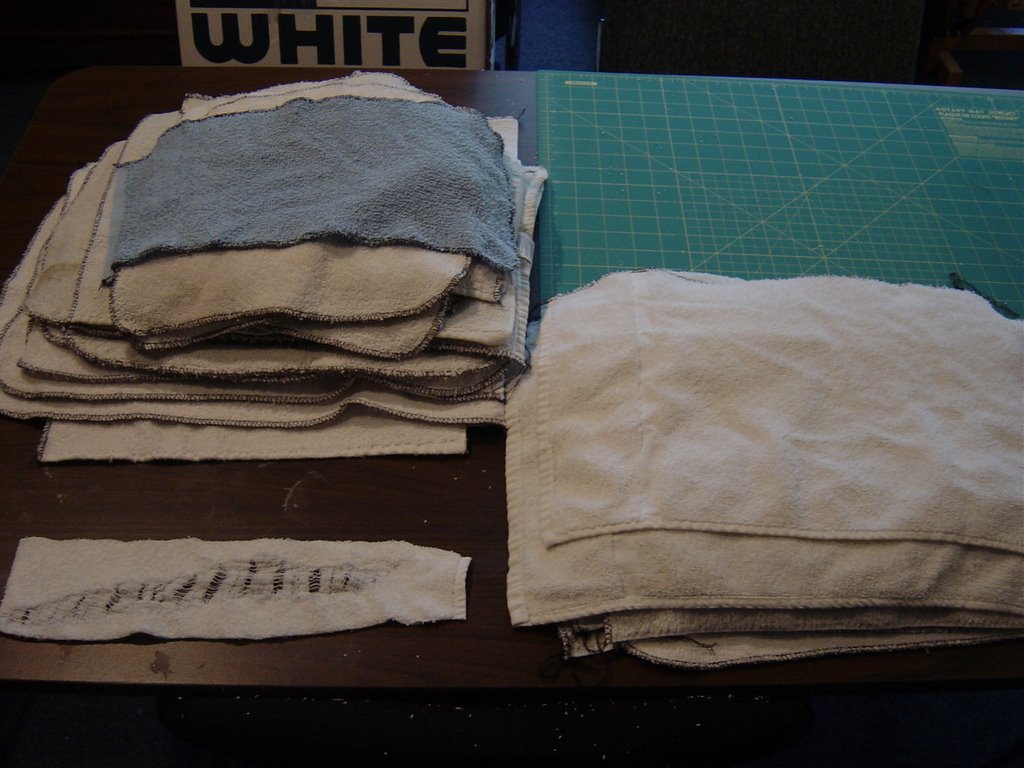
3. Serged rags - ugh.
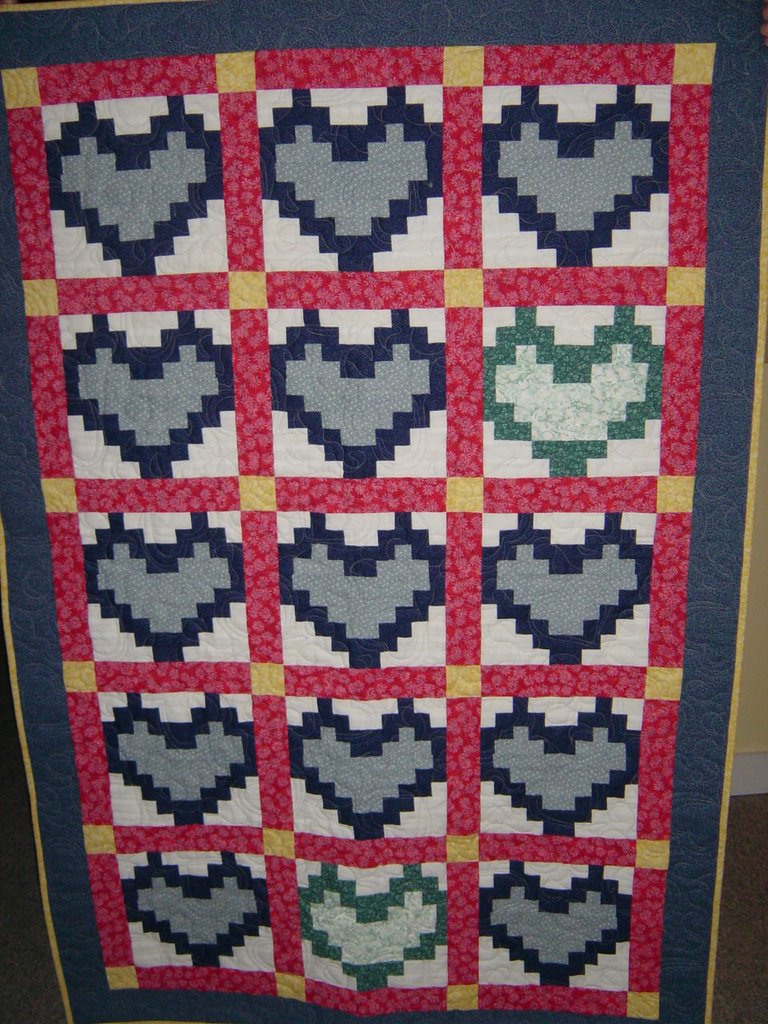
4. Put 1 border on a heart swap top - still need to buy fabric for final border
5. Forced myself to make 2 star blocks for another UFO - making progress!
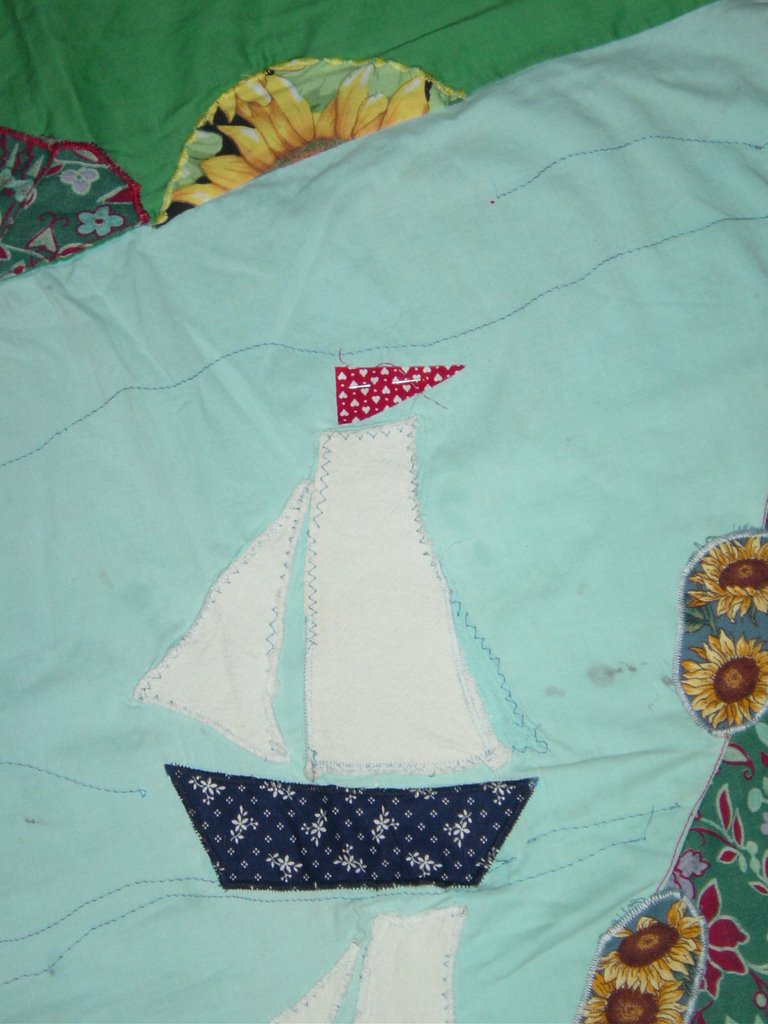
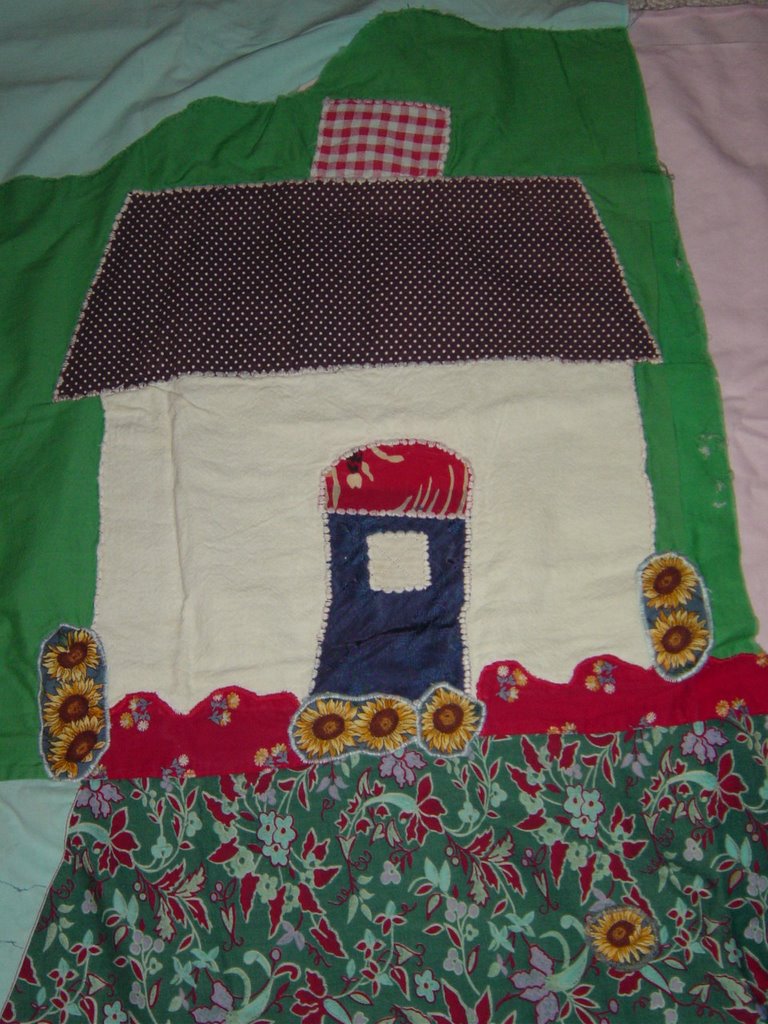
6. Made some friendship wonky house blocks
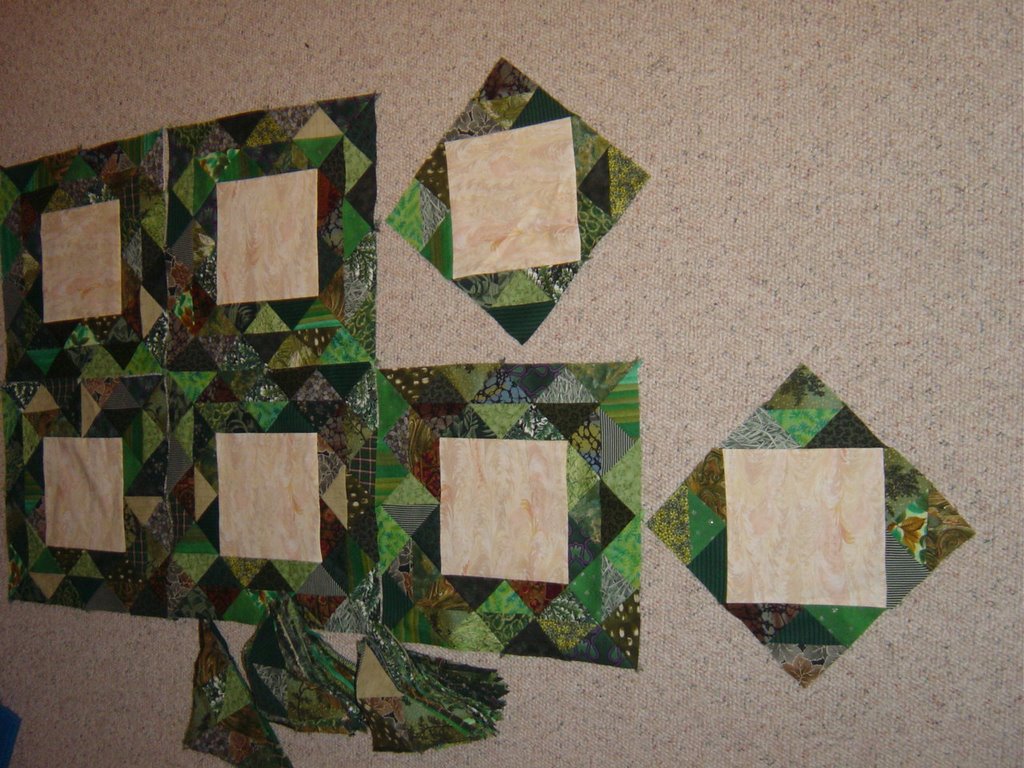
7. I am picking away on my 2 Ocean Waves tops

8. Got the heart quilt out in the mail to my Nana's cousin - all labeled!
9. I didn't start anything new...


So - onward into June!!!

Saturday, May 27, 2006

Nana's Doll and Cradle


My Nana made this doll and cradle for me when I was in my early teens. Isn't it sweet (the dolls face is embroidered)! The doll is 8" and she just fits into her cradle.

Actually, I think that Nana made alot of these. Some of my nieces also have cradles and dolls. And, I am almost positive that Nana made more to donate to needy children at Christmas time. Plus, there are a few odd dolls here and there around the family but without cradles.

My Nana was a very skilled sewer. My Grandpa encouraged her and always told her - if you are going to spend your time sewing, use the best materials you can buy. She sewed many wonderful things - this baby doll and cradle just one example (and a teddy bear for my brother)! Every year she made me a new school bag - I wish I had that pattern now because it really was the perfect bag! She made me skirts and a pocketbook, a wallet, doll clothes, a little drawstring bag for my jacks, an apron, bean bag frogs, pillows, and probably more things that I just don't remember right now. My very favorite thing she ever made for me was a little round pillow with a zipper in the back to hide my treasures. It was blue (for the color of my eyes) and had a face appliqued to the front - just simple eyes, nose, smiling mouth. I don't know what ever happened to that pillow. She made my brother and nephew similar pillows too. In anycase, I was always thrilled with whatever she made me!

Yesterday my aunt e-mailed me that Nana's cousin's DH is very ill (hospice). Today, while I watched Little Boy play with the garden hose out in the sunshine, I made a new label for that little heart quilt I just showed - I am mailing it Monday to my Nana's cousin as a comfort quilt (I took the doll photos using the quilt as a background). I am not sure I ever met this cousin, but I do know that Nana loved her dearly. It is hard for me to explain, but I feel that sending this quilt to Nana's cousin is like my tribute to Nana. I miss her. I think her cousin will like the quilt and I hope it will bring her a little cheer during this time. I didn't really have any plans for this quilt, I just happened to have it on hand, so maybe it was meant to be...

Friday, May 26, 2006

Heart Quilt


My Hearts Quilt - 43 X 64.
I made the blocks AGES ago. I think the pattern came from a Debbie Mumm book - but I donated tons of my quilting books to my library during a move, so can't double check for you.

Anyway - last summer I finally decided to piece these blocks together. Originally I had 15 blue blocks, but of course, couldn't find 2 of them at the time, so used the initial 2 green "test" blocks I did. The borders/sashing - all from stash. I've since found the missing 2 blue blocks, but rather like the green ones in there. In the fall I sent it off to my long arm quilter and got it back this spring when I was in the States. Take a look at the wonderful quilting she did (as always!)...


Don't go thinking that I sew tons and tons - because you might have noticed that lately I am showing you lots of oldies - but nothing new. Maybe like Sam, I am just on a roll finishing up things I've started. And, this UFO took many years and a few moves before it was made into this completed top.

Well, this morning I was reading a few of my quilting boards and came across a call for quilt entries. My quilts have never been in any shows. I am thinking that I might try to get this one in though - the deadline for photos is a postmark date of June 1st. The show is for machine quilted tops - check it out... www.quiltingonthewaterfront.com - click on Quilt Exhibits for information about trying to enter. And they even have a non-judged catagory so no stress! We will see - I might not be able to make the June 1 photo deadline... but it is something to think about anyway.

Wednesday, May 24, 2006

20 Years Ago... The First Quilt


A while back Cathi over at Crazed Quilter tagged me for a little history - the 20 years, 10 years, 5 years ago thing. So, here is part 1:

20 years ago I made my first quilt, and this is it - going through a little bit of repair.

I was going to a horrid boarding school and this was a 3-D art project. Home for a weekend my sister and I laid it all out on the floor (the very same sister I was sewing with in April!). I used my Mom's wonderful old workhorse machine and zig-zagged everything down. The green hills are just zig zagged to the blue sky! And then after I was comfortable with zig zagging, I used a cam (or is it a kam - but those old plastic disks that had the decorative stitches on them) to do a little bit fancy stitching. We lightly stuffed the shrubbery around the lake and on top of the green hills to give it a puffy effect. I didn't know a thing at all about seam allowances - some of the seams on the back are over 5"! And, what is stabilizer? So, it is a bit puckery. We lined it with an old orange blanket and the backing and WIDE binding (probably 5" too) was a large red print (don't have it anymore, but it is the same fabric as the red shrubs in front of the house). I can't say for sure what my source was for the pattern - probably a combination of my own and something that I copied.

And I absolutely loved this little quilt! It was always on my bed - fits a bottom bunk bed very nicely with the design facing the room. It was great for car trips and beach cook-outs. Sad to say though - I only got a D from my art teacher. Too bad, because it made me quit art altogether for fear of lowering my GPA. Honestly, I think art should be graded on productivity instead of a single teachers opinion. Fortunately the D didn't ruin quilting for me though.

That was 1986. In 1992(?) a girlfriend and I got the bright idea to drive across country from California to Cape Cod in an old car, with no A/C, in the middle of the summer, with NO money. And of course, we didn't tell our parents because we didn't want them to worry! Oh, except I had just enough money to buy a TINY bit of sunflower fabric somewhere (2 little squares), in the middle of nowhere, where we stopped to buy some ice to suck on to keep cool - ice is cheap (we arrived at my families house with 10 cents between the two of us and an empty gas tank, but we made it!). By this time the quilt was badly in need of repair - some of the fabric had shredded and there were holes and stains. I cut out the sunflowers and appliqued them over the parts that needed hiding. I trimmed the sails on the sailboats and re-appliqued them down, but some parts I had to cut all new. In 1992 that was my idea of a perfect fix!


Here you can see where I snipped a sail and re-sewed it down! This little boat also got a new flag in the process. I love how I just used a wavy running stitch in dark thread to create water movement. As a brand new quilter, I didn't know any "rules" and just did things!


This is the house - with a silk-y door and 1/2 circle window on top - that fabric has held up really well. The house and sails are a very soft woven fabric - if a tiny bit gets out from the stitching it frays! But by the time I got to the house I was using the cams for stitching and that has held together really well.

So, this is my first quilt. It makes me laugh every time I pull it out and I really must find some old blanket to re-line it and make it into a beach blanket for Little Boy. And that was 20 years ago - I will have to rummage around in my photo tubs for what I was up to 10 years ago...

Oh, and shortly after I made this quilt I got very sick and left that awful school. When I started to get better my Mom bought me an old black "portable" sewing machine that weighed a ton from a yard sale for about $20. Mom got me into a log cabin quilting class and I made the blue log cabin I showed you this past winter - somewhere in the archives of my blog. I had to measure out all my strips with a wooden yard stick (no rotary cutter!) and learned about 1/4" seam allowances. And my poor Dad had to lug that machine into class for me every week - bet he would fall in love with the new lightweight Janome Jems! It is the only quilting class I have even taken, but it was good enough to give me a working background and I slowly continued from there! I will be forever happy that Mom had the good thought to get me a sewing machine and sign me up for that class and that Dad was a good sport to carry that heavy machine around for me!

Tuesday, May 23, 2006

Feeding a Toddler


The Hospital for Sick Children Better Food For Kids ISBN #0-7788-0045-8 - I think this book is out of print now, not sure, so including the ISBN.

Feeding Little Boy can be a BIT of a challenge, so in desperation I bought these 2 books. I have spent a good portion of the past week reading up on feeding a Toddler and trying out new recipes. I HIGHLY recommend that anyone with a small child run out and buy these 2 great books (or they would make a good gift for any Mom you know) - both loaded with lots of good information and recipes (some recipes are "no-brainers", but sometimes in a Mommy foggy state of mind, we need to be reminded of these things!). The Hospital for Sick Children also has another book - Better Baby Food, but the store didn't have that one - I am ordering that one now that I have had a chance to read the one I did buy.

What have I learned? We cut WAY back on juice. And, after a mere 2 days of temper tantrums, we have decided that we do indeed like water if we are thirsty. Toddlers love to turn juice/milk into a meal so they are full when it actually comes to eating - ah yes - hit the nail on the head! We are drinking milk with meals - and milk is a challenge with Little Boy so every 1/4 cup portion is a celebration. Snacks all pre- ready (carrot sticks, watermelon chunck, cut grapes, sliced peppers) so when he is hungry - I am prepared with something healthy! And, a normal toddler portion size is a mere 1/4 - 1/3 cup - yes, I measured everything out in a little measuring cup until I became familiar with what that looked like. We have a new cup with a built in straw for milk ony! And special seperated trays which happily just so happen to be divided up into about 1/3 cup portion sections. And, a new Dora the Explorer placemat. Our new eating schedule is breakfast, snack, lunch, nap, snack, dinner, 1-2 more snacks, bed. And most of the snacks are actually something that I would put on his meal plate anyway, but by breaking it all down into little segments - he is actually eating. Yeah! Relief! The snacks are something I constantly have to remember.

Freezing smaller portions of healthy meals is a life saver! And... get kid sized silverware...A good set will be used for years.

Next up is a good cookbook for Vegetarian children since he will barely touch any meat - can we all say tofu? And he likes nuts, kidney beans, chick peas and eggs, so protein (at the recommended 2 portions a day) is not a problem.

So far this week we have tried out sweet potatoe/oatmeal cookies (a little sweet, but I will play with the recipe - and they have to be better than store bought chocolate chip), turkey/apple meatballs (Little Boy approved which is amazing since he is just about refuses any and all meat), and frozen yogurt pops (bonus diary points - again too sweet, but I will play with it). We are going to try out many more of the recipes too - the frying canned tuna into patties looks interesting... A good week to try out new recipes since today is the first day I've seen a blue sky in days.


And, to keep it quilty - I managed to put the final 2 borders on my Mitre Box quilt. Plus, I have been plugging along with my oceans waves blocks.

Tuesday, May 16, 2006

A plan for this UFO


Everytime I take this UFO out, I think - um, what was I thinking? Other than the fact that it is bright and in primary colors - did I have a plan? Well guess what? I have a plan for this top now - or at least I think I do!

Linda J. over at catsnqlts is sending me some great TRAIN blocks for Little Boy! So, I am thinking of adding a TRAIN border all around this top. And, then I can add his name going down the big empty blocks diagonally. And in the other big empty blocks I can something like 1, 2, 3 and maybe some simple applique shapes. So, I am going to get busy making some more train blocks - it is sort-ov like a new project, but I am using a UFO as the base - got to love that!

On my blog, I have changed it to show just 2 posts - for all my previous posts you have to click on the title or go into the archives. Because I am high-speed wireless internet a huge 1st page is no problem - but for anyone on dial-up, I think this will make visiting my page a little speedier. It's worth a try - how many of you are on dial-up anyway? If everyone is high-speed I can switch it back to showing lots of stuff all at once or maybe 3 posts at a time? Anyone with dial-up - feel free to clue me in because I just don't know!

And, I've added a weather pixie to my sidebar - isn't she cute! Except she isn't wearing a jacket - I still am - so obviously we have a difference of opinion on what to wear on a cold, rainy day. In her defense though - her weather guage is located some distance from me, which is probably a warmer place, so just add another layer of clothes onto my pixie for a more accurate Starfishy weather forecast! Which - you might notice for today - is RAIN. More rain. We have had rain, rain, rain and more rain! So, I haven't gone on my trip yet because who wants to go on vacation in the rain?

One good thing about being stuck inside all day though - I called Keepsake Quilting (finally!) about that binding gizmo and they said - no problem for me to return it because I have the receipt!!! AND, I bought this last summer (just got around to testing it out), so I thought that was very generous. I can return it for an even exchange of merchandise so I have been looking off and on at their on-line catalog. Thank goodness DH told me to rescue the thing from the rubbish and call about a refund - and that I could actually find a receipt from last summer! Keepsake was so super nice about the whole thing you would think I was ordering something, not returning it! Yippee!

Thank you for all the nice comments about my scrappy blue quilt/Little Helper!
 Posted by Picasa

Sunday, May 14, 2006

Making the Blue Quilt


I sometimes dream of one of my quilts hanging in a show - you know - one of those quilting shows with a lady wearing white gloves to oh so carefully turn the quilt back for admiring eyes. Yeah right! Reality check would be the Little Boy exporing a quilt in progress - on a BIKE! Actually - Little Boy likes the zig zags - he thinks they make perfect roads! I had thought I might get away with laying down a border - during the day - Silly Momma! Is it any wonder that I usually sew at night? And I already know that Darcie is going to tell me that I have to put this photo on the back of the quilt as part of the label! Oh yes, this photo would be just the perfect label for the white gloved lady to oh so carefully turn back for admiring eyes! No touching the quilt, please! No, honestly, I just want my quilts to be loved and used - my house definately isn't a white glove house!

And in the end, I did get the top finished (with a few little changes to my first ideas along the way)!
TA DA!


The original idea of a red inner border was too harsh so I went with a soft lavender. And, the first pieced border option that I was considering - I like it, but it isn't for this quilt, but I'll use it on something else (I tacked a photo below just so you could see). I am not even entirely sure that I had enough blue fabric had I continued with the original border idea. So, piano key border it turned out to be, which I like. In a clever moment, I thought I would put the border on just 3 sides, leaving the top completely border-less - it just goes under the pillows anyway. I got it all sewed together like that and then thought it did look a bit funny so unpicked some sewing in order to add the final lavender and piano key border. Of course, in doing so I ended up with 2 end keys slightly off-sized, but believe you me, Honey, I really don't think anyone is going to notice so I'm not growing any gray hairs over those 2 keys!

Let's see... 74X101 - a goofy size I know, but I had wanted to make 1 more row and didn't have enough fabric! Squares were cut 3". Lavender border was cut 3". Piano keys were cut 2" X 6.5" (because my ruler is 6.5" wide). Formula for cutting the setting triangles from Bonnies site at www.quiltville.com. All created by ME as I went along - and if there is an exact same pattern out there by a designer - all I can say is maybe we took math classes with similar concepts? Or, maybe we both have the same 6.5" ruler? Or, maybe we both like to cut our strips even 3" and 2" widths (so much easier than increments!). Absolutely NO insult mean whatsoever to our wonderful designers who design beautiful patterns for us. I buy many different patterns and always give credit where credit is due - BUT, a simple 9 patch design or 16 patch has been around for ages! Alternate sets, zig zag sets, sashed sets - all been around for ages! These are timeless designs, mix and match, handed down through the generations, and hopefully will continue to be handed down to future generations. Use any color you want! Use any fabric you want! Cut the squares 2" if you want and the piano keys 3" if you want. Make the design work for you! There, I said it - and that is all I will say on the current copyright discussion that is raging!

Oh, and I was originally inspired to create this quilt by Jeanne's monochromatic orange quilt over on Spiral ( March archive is orange, February archive is blues/greens), but somehow, mine ended up looking nothing at all like hers! But it was her quilt that inspired me to cut all my blue fabrics into 3" squares and since I had the fabric out and was cutting it anyway, I cut 2" strips for no reason at all - which I was able to put to good use sooner than I thought with that piano key border. So, thank you Jeanne!


On another note - thank you for all the nice comments about my Ocean Waves - in progress. Hopefully I will get a chance to work on it - off and on - over the summer.

And, in closing, on this Mother's Day - I leave you with a photo of one of my Hens and Chicks that I planted in memory of my Mom. I planted this one just last year and look at how many little chicks it already has! A simple little plant that brings me happy memories.


Wednesday, May 10, 2006

Green for the month of May


I have a ton of other things I should be doing right now, but I wanted to pop in and say hi! Time to sit on the couch for a few moments, sip a cup of hot tea, put my feet up and... blog. Ah yes, relaxation!

I have no time to quilt right now, really no time at all. Well, OK - I did try to lay out a border the other day and Little Boy promptly rode his big wheel bike all over my entire top! My mistake - I usually only sew at night, but lately I've been too tired to sew at night so thought I would give daytime a try. Ha! Ah well. Call me Shack-Whacky - it has been raining all week - which translates into no long walks to tire the busy boy out. And bad weather has sort-ov delayed my trip too. Sigh. Oh, but wait - all this rain is equaling - green grass! That must be why this month's color theme is green... sooo....

In progress - I present - Ocean Waves in GREEN! I started this last fall while I was visiting on the Cape and worked a bit on it again in April when I was back there. Call it my Cape quilt, but hello! It is GREEN - so works for May Show & Tell. All the little triangles are already pieced - I just have to put them onto the plain squares (which is actually a subtle marbled fabric). And this project is even on my Top 25 list as 1 of 2 Ocean Waves UFO's I would like to finish and since I have been so good and sticking to my lists, there is actually hope that this quilt might get finished sometime in the near future. And, I would dearly love to finish it - although it isn't perfect, I like it!


And how does a busy Momma with a Toddler shop for scrappy fabric for such a quilt? Seeing that I was on the Cape when I started it and didn't have a scrap of fabric with me? I bought 3 fat quarter packs on clearance at a quilt shop! So, the range is very interesting - some prints I just love and then there is alot of stuff that they obviously weren't selling, but combined together I think it is looking pretty good. I was desperate for some fabric and just having the background fabric measured and cut was almost pushing it with Little Boy that particular day, so the fat quarter bundles were a life saver! Even the fabrics that I was thinking - eeewww, had to be used and now I am happy that I did use them all. There is very little left over (I opened up some of them a bit bigger to show the variety) but there is enough left to add a bit to my stash! My happy green May stash!


Monday, May 08, 2006

A Well-Loved Quilt


I made this quilt for my Grand-niece. I used left-over pastel 2" strips from making one of my sisters (her Nana) a log cabin quilt. So, now the two of them each have a quilt with some of the same fabric. Or at least - soon - I still have to bind my sister's quilt! This quilt measures 57X57 and, yes, I sent it out to my long arm quilter (I know, I know - some of you are just shaking your heads in amazement that I would send such a small top out - but look at the beautiful quilting...)


The panto is called Rosie and my quilter used a rainbow thread which my g-niece was very excited about.

I never really know how big to make a quilt. I like to keep kids quilts small enough that they will fit in the washing machine/dryer, but big enough to cuddle under and look pretty on a bed, but still small enough to carry around. Hummmm. So, I was just thrilled when my niece later sent me an e-mail saying this was a perfect sized quilt for a 6 year old. Phew!

The fun part about this quilt is that I put it together without too much thought. I just made some random rail-fence type blocks, added the borders with pieced blocks for the corners and sent it off to be quilted with the request for something flower-y. Really simple. But what a reception! I can't tell you how much my little g-niece loved this quilt. She smiled and smiled and smiled and petted it and took great care that the dogs wouldn't get on it (and she is a real dog lover, so this pretty much says it all!). Little Boy was pretty happy that she liked it so much too - he told her it is for having a picnic on! Her very happy reaction instantly made this one of my all-time favorite quilts to make and give away!

So, there you have it - a well-loved quilt! And, I leave you with this post for probably 2 weeks as I have alot of stuff to do, plus a trip. But I didn't want to leave a post about serging rags, of all things, to be my going away post!

Sunday, May 07, 2006

Using a serger / serging rags


First off, meet my serger! This is a White 2000 ATS and a simpler serger you have never met. Trust me, I should know - I had a serger in the late 80's that I would have dearly loved to throw out the window, but in a sane moment I traded it in for a sewing machine. 
Phew! Sergey have really become much easier in recent years. I do not think you can go wrong with any of them.


And just to prove it how simple this machine is - here is a photo of the inside - complete with a color coded chart for each cone of thread. Every single spot that you have to thread the thread through is marked with the corresponding color. Got to love that! Oh, AND the tension dials have numbers - definately something my first serger didn't have, grrr!

I once heard that having a serger is like having a microwave. You see, you need a kitchen stove to cook, but not a microwave (although is is handy!). Same concept with sewing - you need a sewing machine (well, unless you hand sew), but a serger is nice too - I guess that pertains to making clothes because you certainly don't need a serger when it comes to quilting, but since I do like to make clothes, I also have a serger! Let me tell you, this baby is super fast! And today, I put it to good use in a very boring sort of way.

I thought I was being clever today to post about lobster to spare you all the boring, mundane chores of my day. But, in retrospect, perhaps it is of interest, so I might as well blog about it, or at least, this one chore! After all, my great grandmother probably thought it was pretty mundane to say... milk the cow, make butter, spin yarn, make maple syrup? I am not exactly sure what my great grandmother did on a daily basis, but those are some of my guesses. I have heard stories of my grandmother cutting worn parts out of big sheets and re-seaming them to fit a smaller bed, so perhaps recycling is in the genes? Because today I was recycling my old, stained or ripped towels, into cleaning rags.


Oops, not the best photo - guess the flash didn't go off, but perhaps you can see the stack I am working on - I put a shredded scrap in the front just to show how thrifty I am being! You can also see part of the serger box - I keep it in the box when not in use. Anyway, I just cut the towel into segments and serge around the raw edges using 3 cones of thread (not 4). I get 6 rags from a bath towel. Towels make the BEST cleaning rags! Except that towels with raw edges unravel like crazy in the washing machine, creating big knots and generally wreaking havoc in the laundry room. So, I was serging the edges today and giving each end a generous double-sided dab of Fray Check to prevent the stitching from unraveling (because you can't go forward/backward to lock your stitches with a serger like you can with a sewing machine and I was being too lazy to work a tail back into the stitching). Recycling my towels into nice, new cleaning rags that won't unravel in the wash.


And just in case you might have a serger that you really don't know how to use or are thinking about getting one, I would recommend this book - Serger Secrets, High-fashion techniques for creating great-looking clothes/A Rodale Sewing Book, ISBN #1-57954-464-9. I've had this serger for a few years now and still refer to this book often!


Saturday, May 06, 2006

Lobster!


Oh look - I have found another use for my 4" ruler - to show you how big this lobster is! No, we didn't eat these lobsters - we got them empty. I think the BIG lobsters are not so good to eat anyway and depending upon how BIG a lobster is - not even legal to take out of the water alive - but since I am not a lobster fisherman, I can't tell you the laws for sure. But, the big lobsters are the ones that lay the most eggs, so to take the really big ones, well, as a lobster fisherman - it isn't a good thing for the future.

In anycase, my DH has been on the lookout for a BIG lobster to make some kind of display for the dining room. And, local fisherman delight in dropping off various claws and lobsters for consideration - these lobsters are the latest offering! As far as the really BIG lobsters - sometimes dead ones will come up in the nets - totally empty because the ground eaters of the ocean have already gotten to the lobster meat. So - this is what is decorating my front porch for right now!

P.S. I absolutely don't eat lobster anyway. But, if you like lobster - DH has a foolproof way of cooking them - he puts them in a brown paper bag and microwaves them. Yup. No waterlogged lobster and they are nicely steamed. I know - sounds gross, but no worse than boiling them alive, right?
 Posted by Picasa

Monday, May 01, 2006

More about April


I was trying to keep my April posts more geared toward my quilting and busting fabric stash, afterall - this is a quilting/stashbusting list, right? But, then I decided that I miss my little snippets of our everyday life, it's not all about sewing! Our days are filled with typical Toddler stuff and the more time spent outside, the better! Most of my sewing time is at night, after Little Boy is in bed (a good incentive for me to keep him on schedule so I am not too tired by the time he goes to bed!).

Anyway, I really want to remember these times and have been printing out my blog to keep as a printed diary. I thought I would quickly add this post with some April photos to round out the month of April, so to speak, before May takes over! Just as a side note, so you don't think that Little Boy is a solitary child, I don't post photos of other people's children - he actually does have playmates! So - no photos of the Cape or NH this past month, but I am going to start to print out a photo collage of the month in review to add to my blog print-outs. This is probably a more realistic plan than for me to think that I am going to organize all my photos into albums! A quick monthly photo collage seems more do-able.

So, the first photo is Little Boy playing in one of my new planters that DH had built for me last year when I was away. I came back and there it was! I like raised beds and this one HUGE! This is the planter I am considering putting in a pumpkin patch for Little Boy, or maybe squash. Something easy! In the meantime he thinks it makes a perfectly great place to play with his trucks! He is down in that back corner playing with his backhoe. Thank goodness we haven't added the topsoil yet because let me tell you, his pants get muddy enough as it is! He understands that we are going to put some plants in there, so I have my fingers crossed that he is going to give up his construction zone without a fuss. Who am I kidding? If you were almost 3 what would you prefer? A garden or a truck zone? Humm - we will have to see if this plan needs to be revised.


And this is the other end of this garden (it is completely enclosed, so makes a great play yard for Little Boy!). Behind him is a much smaller planter that is for kitchen herbs. It has finally warmed up to the mid-50's (11 C for those on the metric system) which is warm enough for us to eat lunch outside if it is sunny! The translation to this statement is that it is now warm enough that you don't need mittens.


We go out for a walk everyday, as long as it isn't raining. This is one of our favorite trails which is .8 kilometer (1/2 mile). Little Boy is good for up to about 1 mile, but is happiest with 1/2! He actually goes further than that because he tends to run back and forth, back and forth a bit! Another beautiful day - no mittens, no scarf, but he still has tights, winter pants, a turtleneck onsie and sweater on. Can you tell that by April I am ready for some warmer weather and oh - some leaves on the trees would be nice, but I know that is right around the corner, thankfully! On a happy note here, my hanging flower baskets were all pick-up yesterday by the guy who plants them for me - he keeps them in his greenhouse until the 1st week of June.


And even if we are stuck inside on a rainy day (and it has rained a bit much this past month!), we still have fun. Here we are doing the waltz and laughing our heads off!

So there you have it - a glimpse into our everyday Momma/Toddler life!

Martelli Binding Fiasco


And about that binding tool...

Well, I promised to tell you how I made out with that Martelli Stitch-n-Ditch Binder Foot. The short story - it is now in the trash (except for the packaging which I have to refer to for this post). I thought for a nano-second about offering it to anyone else who wanted to try it out, but then I came to my senses - I wouldn't wish this thing upon my worst enemy, so why would I offer it to a friend? The long story follows:

First off - the ad in Keepsake Quilting says: "Apply binding completly by machine without stitches showing by feeding your quilt edge underneath this plastic pressure foot, which adjusts for 1/4" to 1" bindings. Set includes four attachments for different batting lofts and six shank adapters for a variety of machines. (Bernina requires its own adapter.)" $29.99.
Sounds pretty good, right. So, I order it and have it sent to Canada - which involves some extra postage/import fees. The directions on the back of the package references some other tools and then states... "*Zip Clips, Minute Miters and SewMate sold seperately. These tools are helpful, but not required." Huh? Oh but wait - I can go to www.martelli-enterprises.com for directions with pictures. Oh wait - that website my computer is unable to find. OK, so skip that thought! But I do search around and finally come up with - tada! - the refered to zip clip system here http://webstore.quiltropolis.net/stores_app/Browse_Item_Details.asp?Store_id=430&page_id=23&Item_ID=1260 and for $54.99 - plus add the shipping. I think for $54.99 you get everything, including the part I already have. And wouldn't you know - the entire system from this website has such an outstanding review that it has you dreaming about perfectly easy, effortless bindings. Ha. Oh but wait, there's more - if you just so happened to buy this neat-o gadget at a SHOW you get a FREE cd or video or something like that to walk you through the steps. So where does that leave me, a mail order customer?
But anyway, it does say that these tools aren't required, and I am already out my money, so I am going to give it a good try. The photo of the thing on my machine is proof of that. But, right off the bat I am having trouble SEEING where I'm going - that big plastic foot kind-ov blocks your view. But I think I can live with that because the guide is adjusted to the right placement. Except that when you start sewing it really DRAGS so you end up with micro-scopic stitches unless you set your stitch length to something HUGE - so then you end up with a combination of long and short stitches depending on how easily everything is gliding along at a certain point. I think that somewhere along the initial testing stage of this product the testers must have run into this issue too because guess what the directions say? "We suggest lengthening your stitch to conduct a "trial run", making any changes to needle position and seam allowance then returning your stitch length to normal". Hummm, interesting.
I tried, I really did. After 2 nights of fiddling around with this thing I did what any practical Momma would do who wants to finish a quilt for her baby - went back to what is tried and true for me - my good old walking foot. Sewed that binding on one side. Then I tried something new - flipped it over and pinned it all down and sewed it on the other side with the walking foot. Remember, I am experimenting on toddler quilts in prep of doing this on a big quilt (trying to avoid hand sewing the binding to the back, but maybe that is still the route I will take). So, one quilt I sewed the binding to the back and then sewed through the binding on the top. The 2nd quilt I sewed the binding to the front and then ran my sewing stitches in the ditch along the front to catch the binding on the back (I liked this look the best). Not sure why someone would ever need a Mitering tool because mine always come out fine. In anycase, I think the binding looks pretty big because way in the beginning the directions for the binding foot said to cut the bindings 2 1/2" and I usually cut mine 2 1/8". And my SQUARE quilts now have WAVY edges, so it might have something to do with a wide binding OR it could be that I used the walking foot on both sides to attach the binding? Not sure! That is a bit beside the point though because Little Boy is very happy with his bound quilts!
In all fairness, I did have a kind person e-mail me about her Martelli binding foot (thanks Cheryl). She too had originally just purchased the set-up I bought. Later, at a show, she bought the rest of the tools and after 4 trys - is now able to say that it is a wonderful gadget. But that brings you right back to the fact that the item is more than $29.99 to work so wonderfully. Personally, I think that is very crooked! I mean, if it is $30 it is $30 in my book, not $30, but if you want it to work like it should - that will be another X$ (couldn't even find where to buy just the needed attachments since I already have part of the system). Just tell me the total cost up front.
So, it didn't go good, not good at all. Except that I was just talking to DH about what I am writting and now he is thinking that I should go fish the thing out of the sewing room trash and take the issue up with Keepsake. You know, I just might do that! $30 sure would buy me some nice, new fat quarters!
*
Edited to add:  Keepsake Quilting promptly returned my money.  Keepsake is a splurge for me, but their customer service is excellent and if you want to splurge - it is good to splurge where this is true just in case something ever goes wrong!  I understand that the binding tool works for some people and they like it.  I have to say, the book that has helped me the most with finishing my quilts is "Finish It" by Alex Anderson.  For a slim book, it is packed full of practical knowledge on how to get perfect bindings and finishing techniques, using tools that you probably already own for quilting anyway, plus some beautiful scrap quilt patterns!  If you buy anything from Amazon, please do so through one of my Amazon links because it helps me out - thank you!