

I bought this little gadget from Keepsake Quilting (it is $30). I am hoping for an easy machine binding experience because I have a BIG quilt to bind and I am not looking forward to it! So, for an "experiment" project, I will bind a little quilt I made last summer for - you guessed it - Little Boy! I just can't help myself - I love making him quilts! I have my binding made and the foot attached to the machine - all ready to roll after Little Boy goes to bed. If everything goes well, then the big quilt will be next; I have my fingers crossed that I am going to love this little thing!
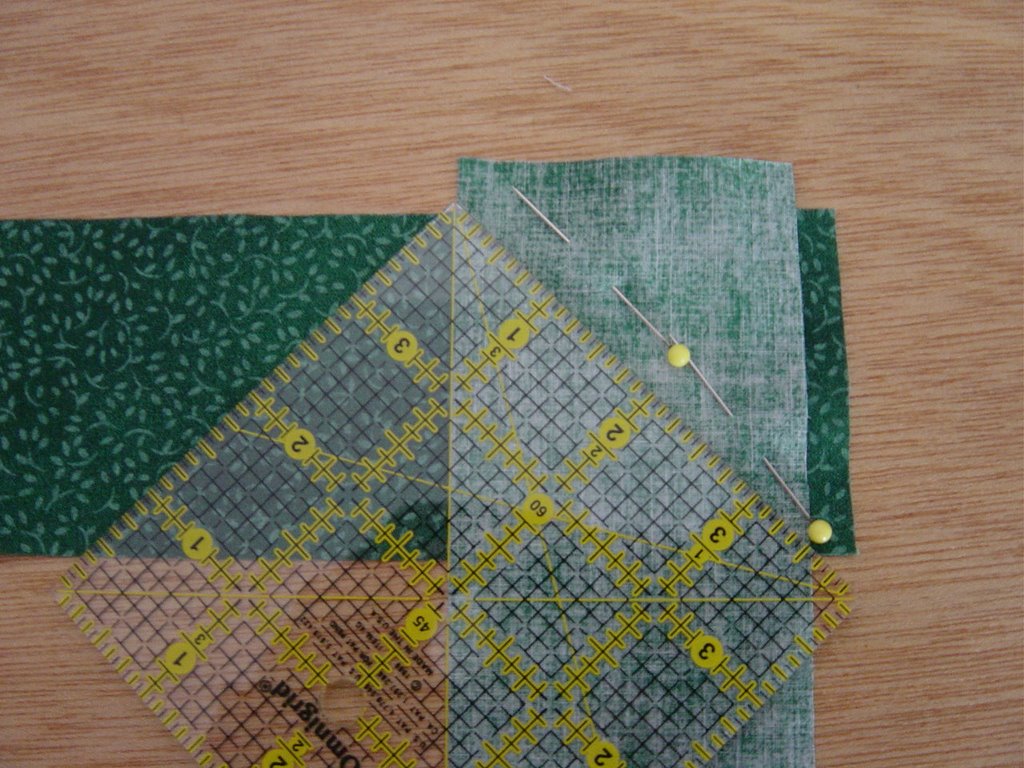
The directions are a bit sparse, but they do say to cut 2.5" strips for binding that will finish at 1/4". I usually cut my binding at 2 1/8", so this looks a bit big to me, but in anycase - I like to follow the directions at least the 1st time I try something new and then I can amend it to my own tastes the next time around, if needed. So, here are my strips. I like to do my bindings with a diagonal seam - and this is how I do it - overlap on each edge about just under 1/4". Pin. Draw a diagonal line where I have the ruler lined up. Can you see that? It is lined up on the 45 degree mark going up and down and diagonally it lines up with the little inside corners that are made by extending the fabric out a little bit. And - I love that little ruler for marking bindings, which is a good thing because it took me the longest time to find a practical use for it!

If you flip your binding and fold on the pen line (not where the pins are, but on the line you marked - and yes, I use a ball point pen to mark dark fabric - gasp!) - it should line up like the photo above. I always double check to make sure it lines up. If it doesn't line up, finger press a fold where it does line up and remark with a new, darker line! Sew on the line, trim the seam to 1/4" and press the seam open. There - perfectly aligned binding with diagonal seams!
6 comments:
I will be excited to see how this works for you. Keep us posted. I cut my binding at the 45 angle then sew togeather after they have been cut.
Evelyn,
I'll be anxious to hear how this works for you. I've seen this gizmo but haven't invested in it...I want to hear from someone how it works first!
Hugs
Laurie
Me too... I've seen it and wondered how it worked. You can be the guinea pig for the rest of us!
This is how I join my bindings too :-) I am looking forward to hear how your binding sewing will be. Isn't it the company that makes Curve Master too ? Curve Master is very good.
I like to sew my binding strips together like this, too...I feel it reduces bulk by having the seams hit the quilt in 2 seperate places rather than on top of one another. Haven't seen this gadget, so I too will be waiting to hear how it works for you!
Good tutorial, Evelyn. Just what is that thing supposed to do anyway? If it did the handfinishing it would be worth every penny and more, LOL.
I don't have much trouble doing binding but then I get tons and tons of practice doing it on the donation quilts.
I cut all my strips at a 45 degree angle and offset them by 1/4 inch and just sew them but I know that others in my quilt group would rather do it the way you do.
Funny thing though--once when I had them cut my way, grouped together with a little strip around them and then kitted up--one of the girls was just sure that I meant that stuff for borders. Her daughter was just sure that I meant it for binding. The daughter asked me later who was right, LOL to settle that discussion.
Post a Comment